
I am still working on this quilt for our guild challenge....
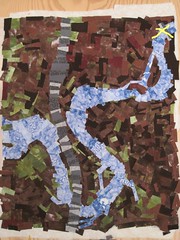
and if you look really closely at the 'X's in the right hand corner...
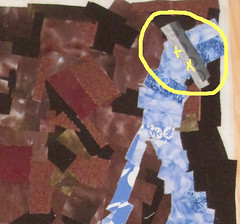
you might see Mr. U and I standing on that bridge last night....
bet you can't see us...
(of course not!
I'm the one taking the photo and Mr. U is probably nearby!)
Anyway,
(of course not!
I'm the one taking the photo and Mr. U is probably nearby!)
Anyway,
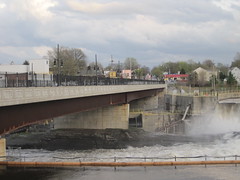
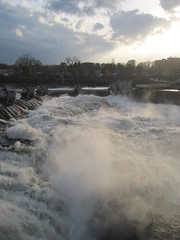
with the spring melts from the Adirondack Mountains and the plentiful recent rains,
the area is experiencing high waters,
and raging falls...
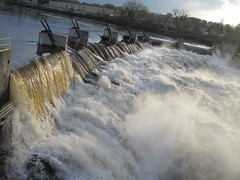
The center of our community is the falls
which has historical significance,
literary reference,
and industrial importance....
which has historical significance,
literary reference,
and industrial importance....
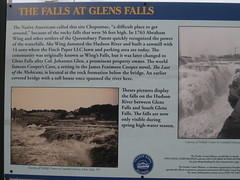
(lots of paper and paper products are produced in this area)
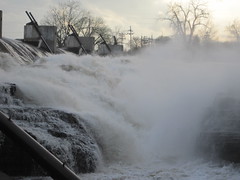
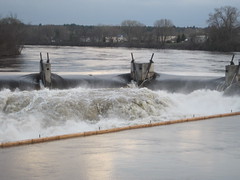
and from our vantage point
on the bridge
we saw...
I've been asked about my "technique" (is that we call it?)
for creating my quilt, "Along The River"
and so...
from my vantage point
(on the floor now)...
here is my attempt at a re-cap/tutorial....
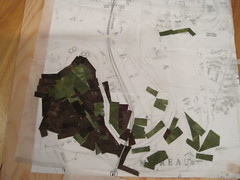
I blew up a map of the area I wanted to include...

I laid some lightweight fusible interfacing on top of the map
with the fusible side up

and began cutting up pieces of fabric (previously backed with Wonder Under)
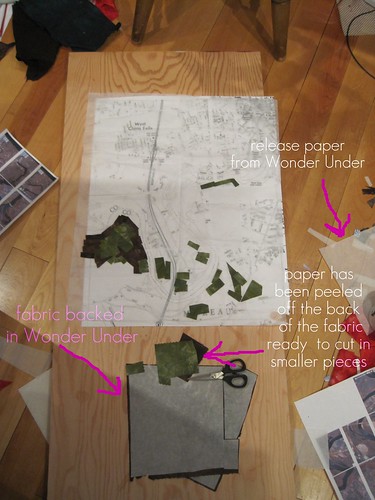
on top of the interfacing...
Occasionally, I laid a piece of the release paper
(that I had peeled off of the Wonder Under )
over the fabric and pressed the pieces in place on the interfacing...
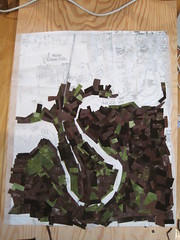
I created the river in the same way
and cut the interfacing along the edges of the blue fabric...
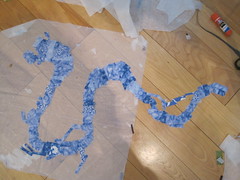
laid it on top of the background
and pressed it in place...
I added the interstate down the middle
in the same way
et voila!

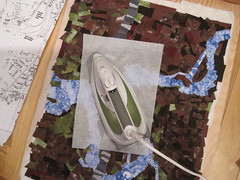
To anchor all the pieces in place,
I sprayed the top of the quilt with a temporary adhesive
(because that is what I had at home but I think I would prefer something permanent)
and laid a piece of black tulle (which I purchased at Joann's) on top of the quilt..

Then I started some free motion quilting....

some lines down the interstate with gray rayon thread
and some zigzags with a silver metallic thread on the river.
I traced the streets off the enlarged map
onto sheets of tracing paper
and pinned them onto my quilt...
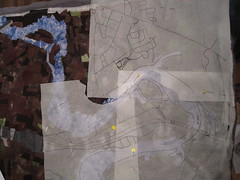
and quilted the roads, using a free motion foot,
through the paper

which I, then, peeled off around the stitching...
I have been using the latest tools that technology can bring....
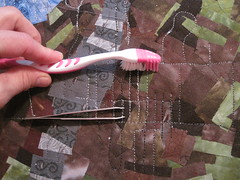
an old toothbrush and a pair of tweezers to pick off
any leftover bits of tracing paper and thread...
(I'm picky about those things!)
Of course,
my project is by no means complete
but this gives you an idea of the process that I used.
I will post photos of the complete project
my project is by no means complete
but this gives you an idea of the process that I used.
I will post photos of the complete project
as soon as I dig myself out....
or peel myself off the floor!

thanks for the "tutorial" on this. You are quite the artist.
ReplyDeleteYou have such a creative mind! The photos you showed make your falls look really wild right now...thanks for sharing them.
ReplyDeleteLove seeing how you do this. I'm hoping someday to be brave enough to try this!
ReplyDeleteLisa!!!! I LOVE LOVE LOVE this!
ReplyDeleteI can't wait to do something like this! Let me ask a question... what was your reason for making the river and the highway separate features rather than layering those colors right into those spaces as you worked? Thanks so much for taking the time to share that process!