
It has been one of those days...
(1) I dropped and broke a bottle of nailpolish (luckily it was clear)
on the bathroom tiled floor this morning...
(2) spilled a mug of smelly paint water on the table and floor of my studio...
and yes,
(3) while picking 7 lbs of blueberries this morning with Sugarbaby...

a stick appears to have poked right into the corner of my eye
(that is, penetrated)...
(that is, penetrated)...
I even saw it myself and eye stuff totally grosses me out!!!
I have taken out my contact lenses
but other than some mild discomfort and some redness, I am able to see just fine!
Anyway, after Renate asked me how I add text and lines to my photos,
I decided that I would take today's post to describe the process
Let's face it...
it is a lot easier than breaking, spilling or poking something else!!!
it is a lot easier than breaking, spilling or poking something else!!!
A disclaimer...
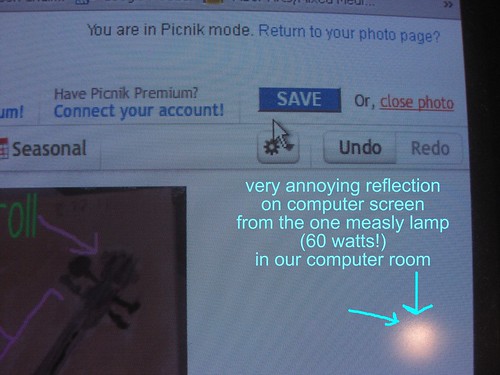
most of the following photos are dark as they are taken of my computer monitor
in our poorly lit computer room
And
this is a process that I figured out by trial and error,
so there is probably many other ways to arrive at the same result.
Here it goes..
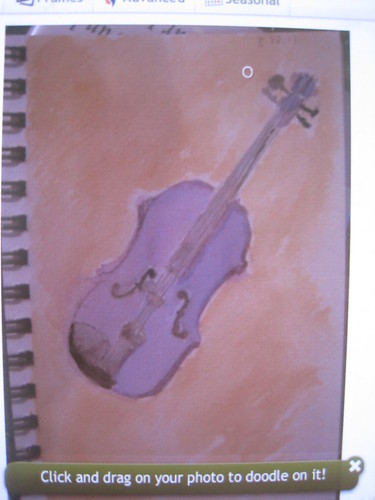
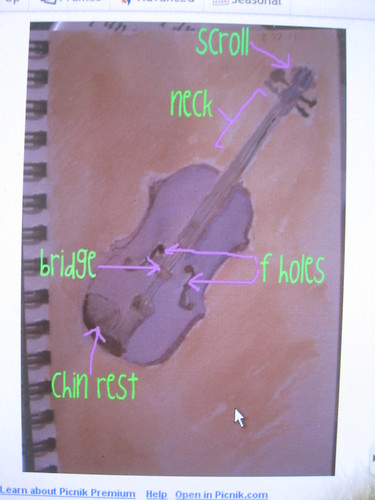
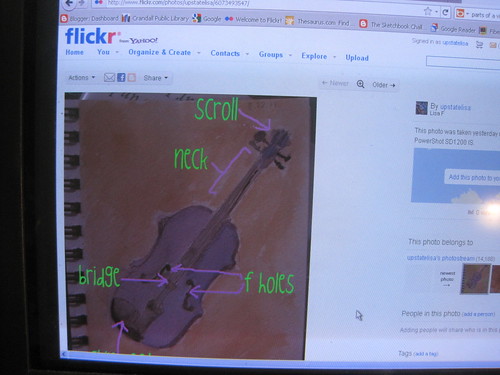
How I edit the purple violin:
We start with a photo that I have downloaded to flickr
(although I believe that you can do this right from your Picasa album too)
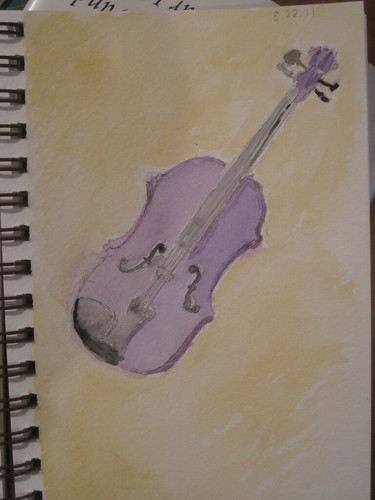
and while I do often take some creative license in my artwork,
Sugarbaby does indeed have a purple violin
(which looks much better in real life!!!)
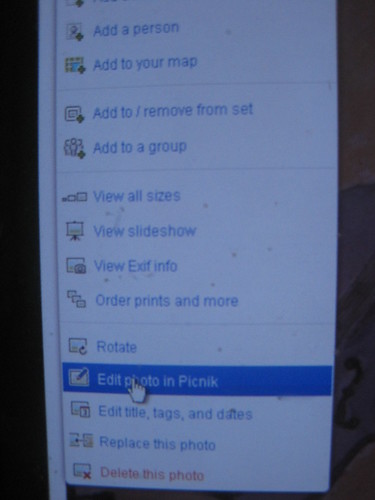
Hope YOU have your glasses on...
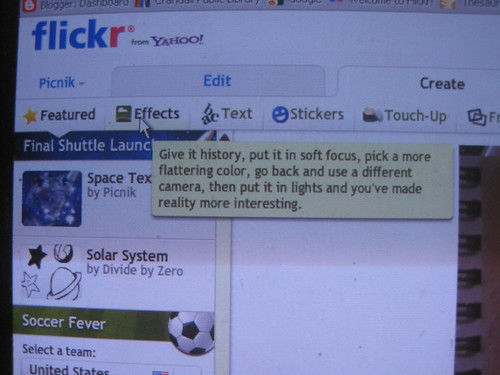
In the "action" menu above your photo in flickr,
click on "edit photo in Picknik"
After a minute,
your photo will appear in Picknik...
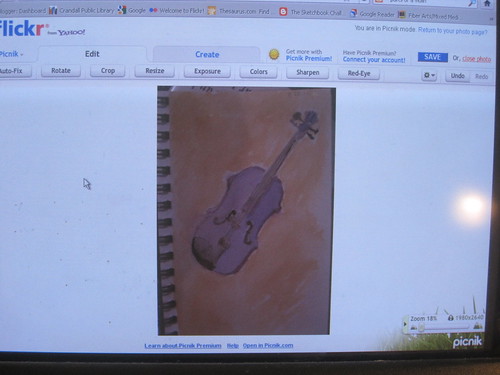
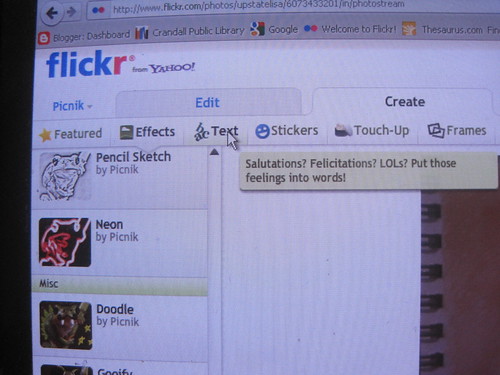
To start, click on "Create" at the top...
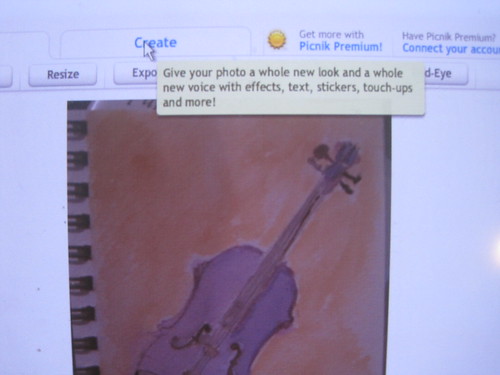
then click on "Effects"
Now scroll waaaaaay down (anyone ever watch The Friendly Giant?)
to "Doodle" under "Misc" and click on that too!
to "Doodle" under "Misc" and click on that too!
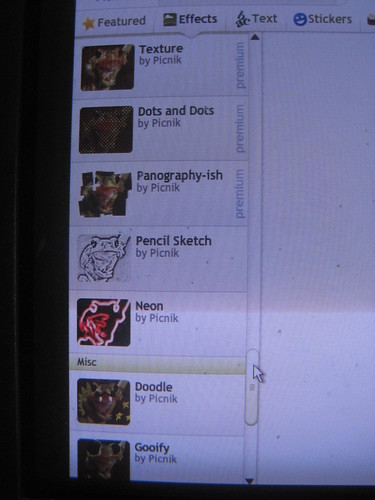
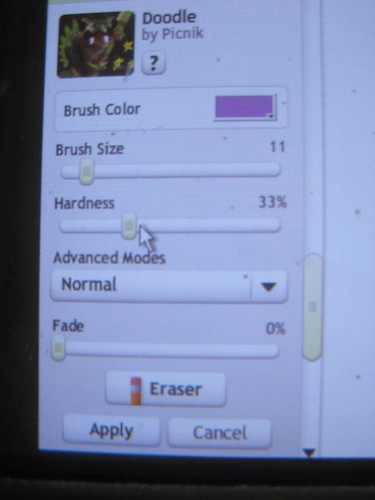
The Doodle menu will open up like this...
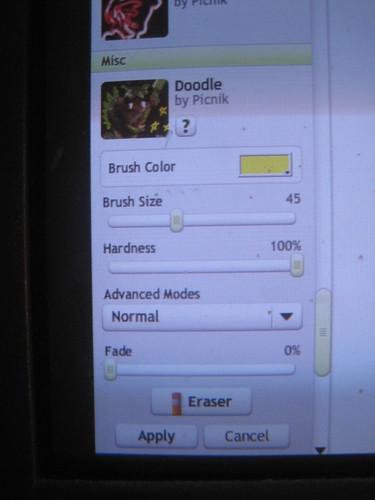
I know!
So many choices!!!
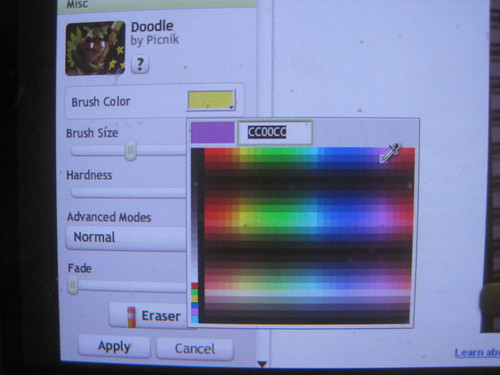
I start with brush color
and size
(not sure exactly what hardness does, but play around to find out!)
The smaller the brush size number,
the thinner the line (which is what I want today)...
Once you have made your choices,
you will find your mouse cursor over on your photo...
and I begin drawing...

until I have all the lines (or drawings/doodles) I need
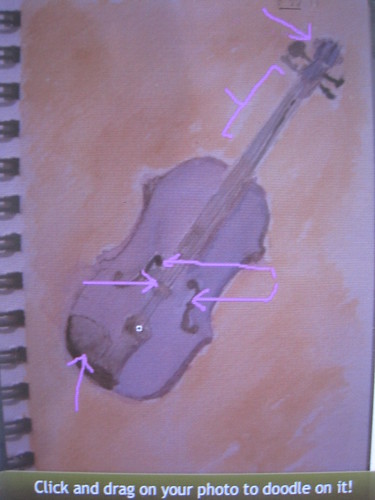
(today I discovered that if I need to erase a doodle,
click on eraser in the doodle menu, rub out what you want
and then click on eraser again to go back to doodling)
and click on 'Apply" when you are done.
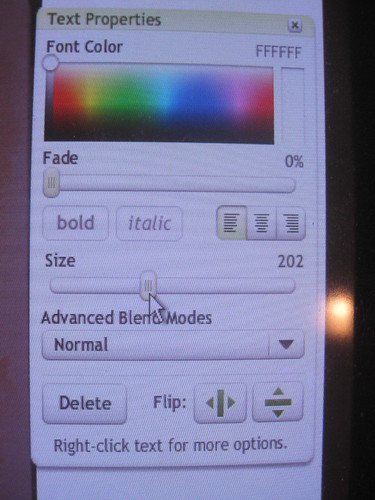
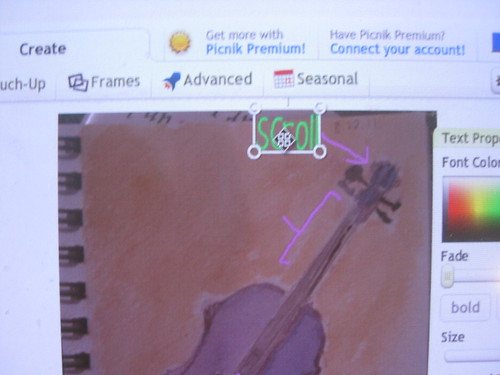
Now I am ready to add text,
so click on it!!!
Now I am ready to add text,
so click on it!!!
and then scroll down on the left side of the screen
to choose the font ...
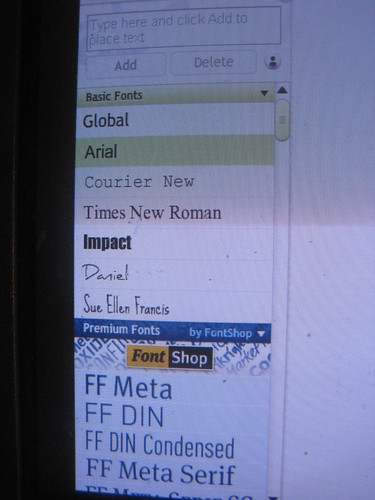
(hint: the white backgrounded fonts are free!!!)
Today, I am in the mood for King Cool KC

(Austin says: "groovy baby!")
Just above the font names is a text box...
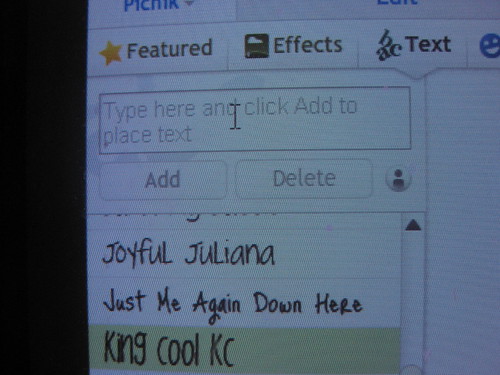
(yup, you got it... that is where you type!)
like the word.... scroll!
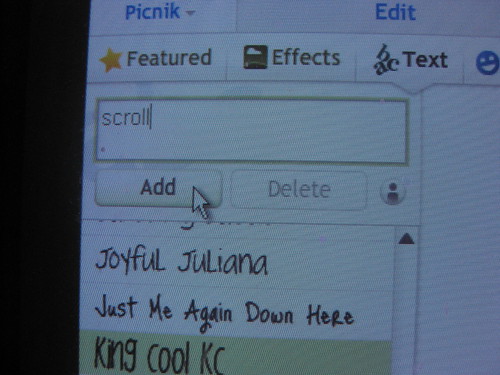
then click on "Add"
Hmmmm... more choices!!!
(the word, scroll, is waiting for me in the middle of the photo!)
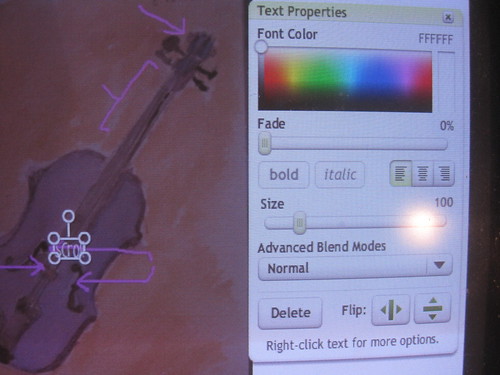
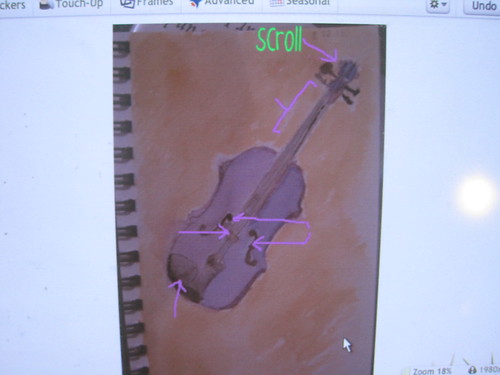
I start by moving my mouse over the size (trial and error, personal preference)
and select the font color next...
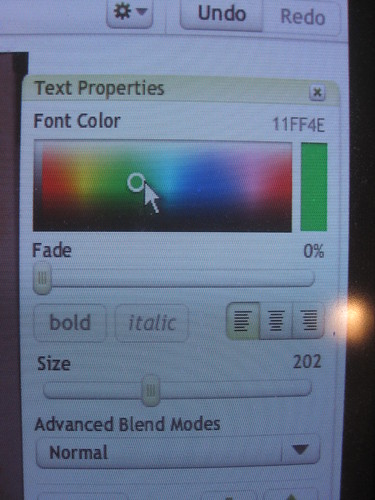
and you can now see that scroll is bigger and green!
(It's not easy being green!)
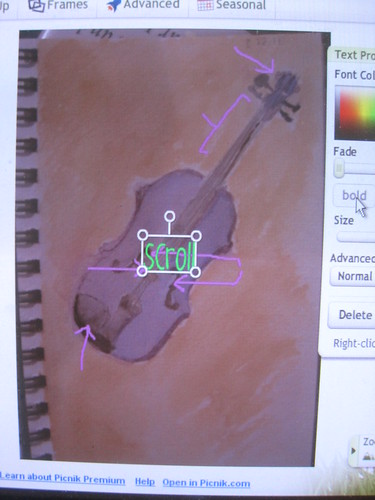
Now I stick my mouse cursor over the word
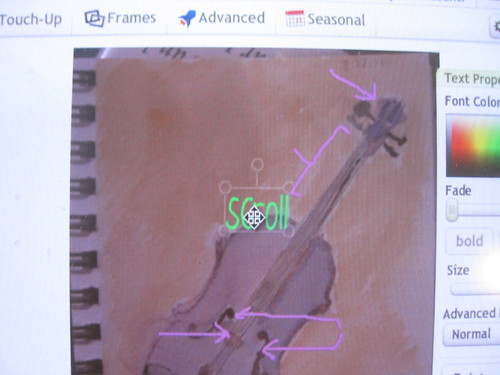
and drag it into the position I want
move the cursor off the word
(I usually click somewhere else on the photo)
et voila!
I have text to go with my doodles...
Now you need to save your edited photo
(save is at the top right hand corner)...
(save is at the top right hand corner)...
(Hey, I edited this photo!!!)
and you can make any changes to the title, description,
tags, permission, etc now...
tags, permission, etc now...
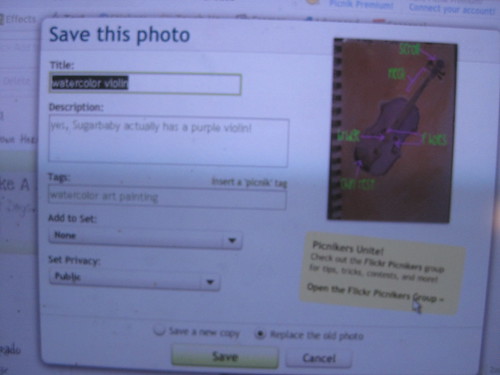
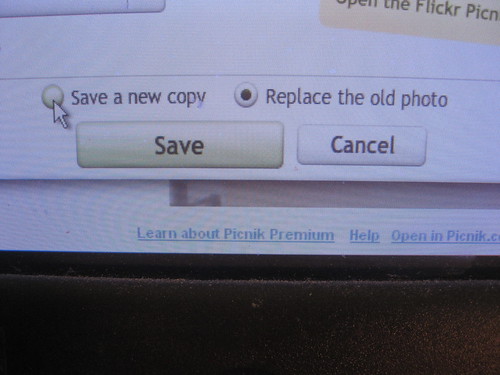
and you can save a new copy of the photo
(in addition to the original photo on flickr)
or you can replace the old photo
(and this deletes the original photo on flickr)
Your choice....
(in addition to the original photo on flickr)
or you can replace the old photo
(and this deletes the original photo on flickr)
Your choice....
and then you sit and wait...

and wait a little bit more...
until your edited photo appears on your flickr account!!!
As my father, the physicist says, QED
which I always thought meant quite easily done!
Clearly,

I am not a physicist!
And luckily, I can still see clearly!!!
Yee Haw! Thanks Lisa! This is great! I've got this bookmarked now!
ReplyDeleteI am glad your eye is ok. I would love to get my hands on some fresh blueberries - they are my favorite!
ReplyDeleteI'm just catching up on my blog reading and have been drooling over all the things you are experimenting with - LOVE the gelatin printing - how cool is that?!! Then something caught my eye - the font you used, designed by Kimberley Geswein? I'm her FB friend! Uh huh uh huh! OK so I don't really know her in real life, but I met her on a stamping forum years ago, then they moved to China and I followed her blog/FB - http://gesweinfamily.com/ - all about their stories, and now they're back in the USA - and guess what else? She's a stay at home Mom who designs fonts and wait for it - homeschools her kids, just like you! Very cool :) Oh the internet is a small place :) And that is my rambling stalkerish blog comment of the day :)
ReplyDelete